The Manage Pipe Specs window on the Analytics page shows the list of pipe specifications available for use in the other Field Notes Forms sections. Pipe specifications are used to define the properties of the pipes that are being analyzed in the forms.
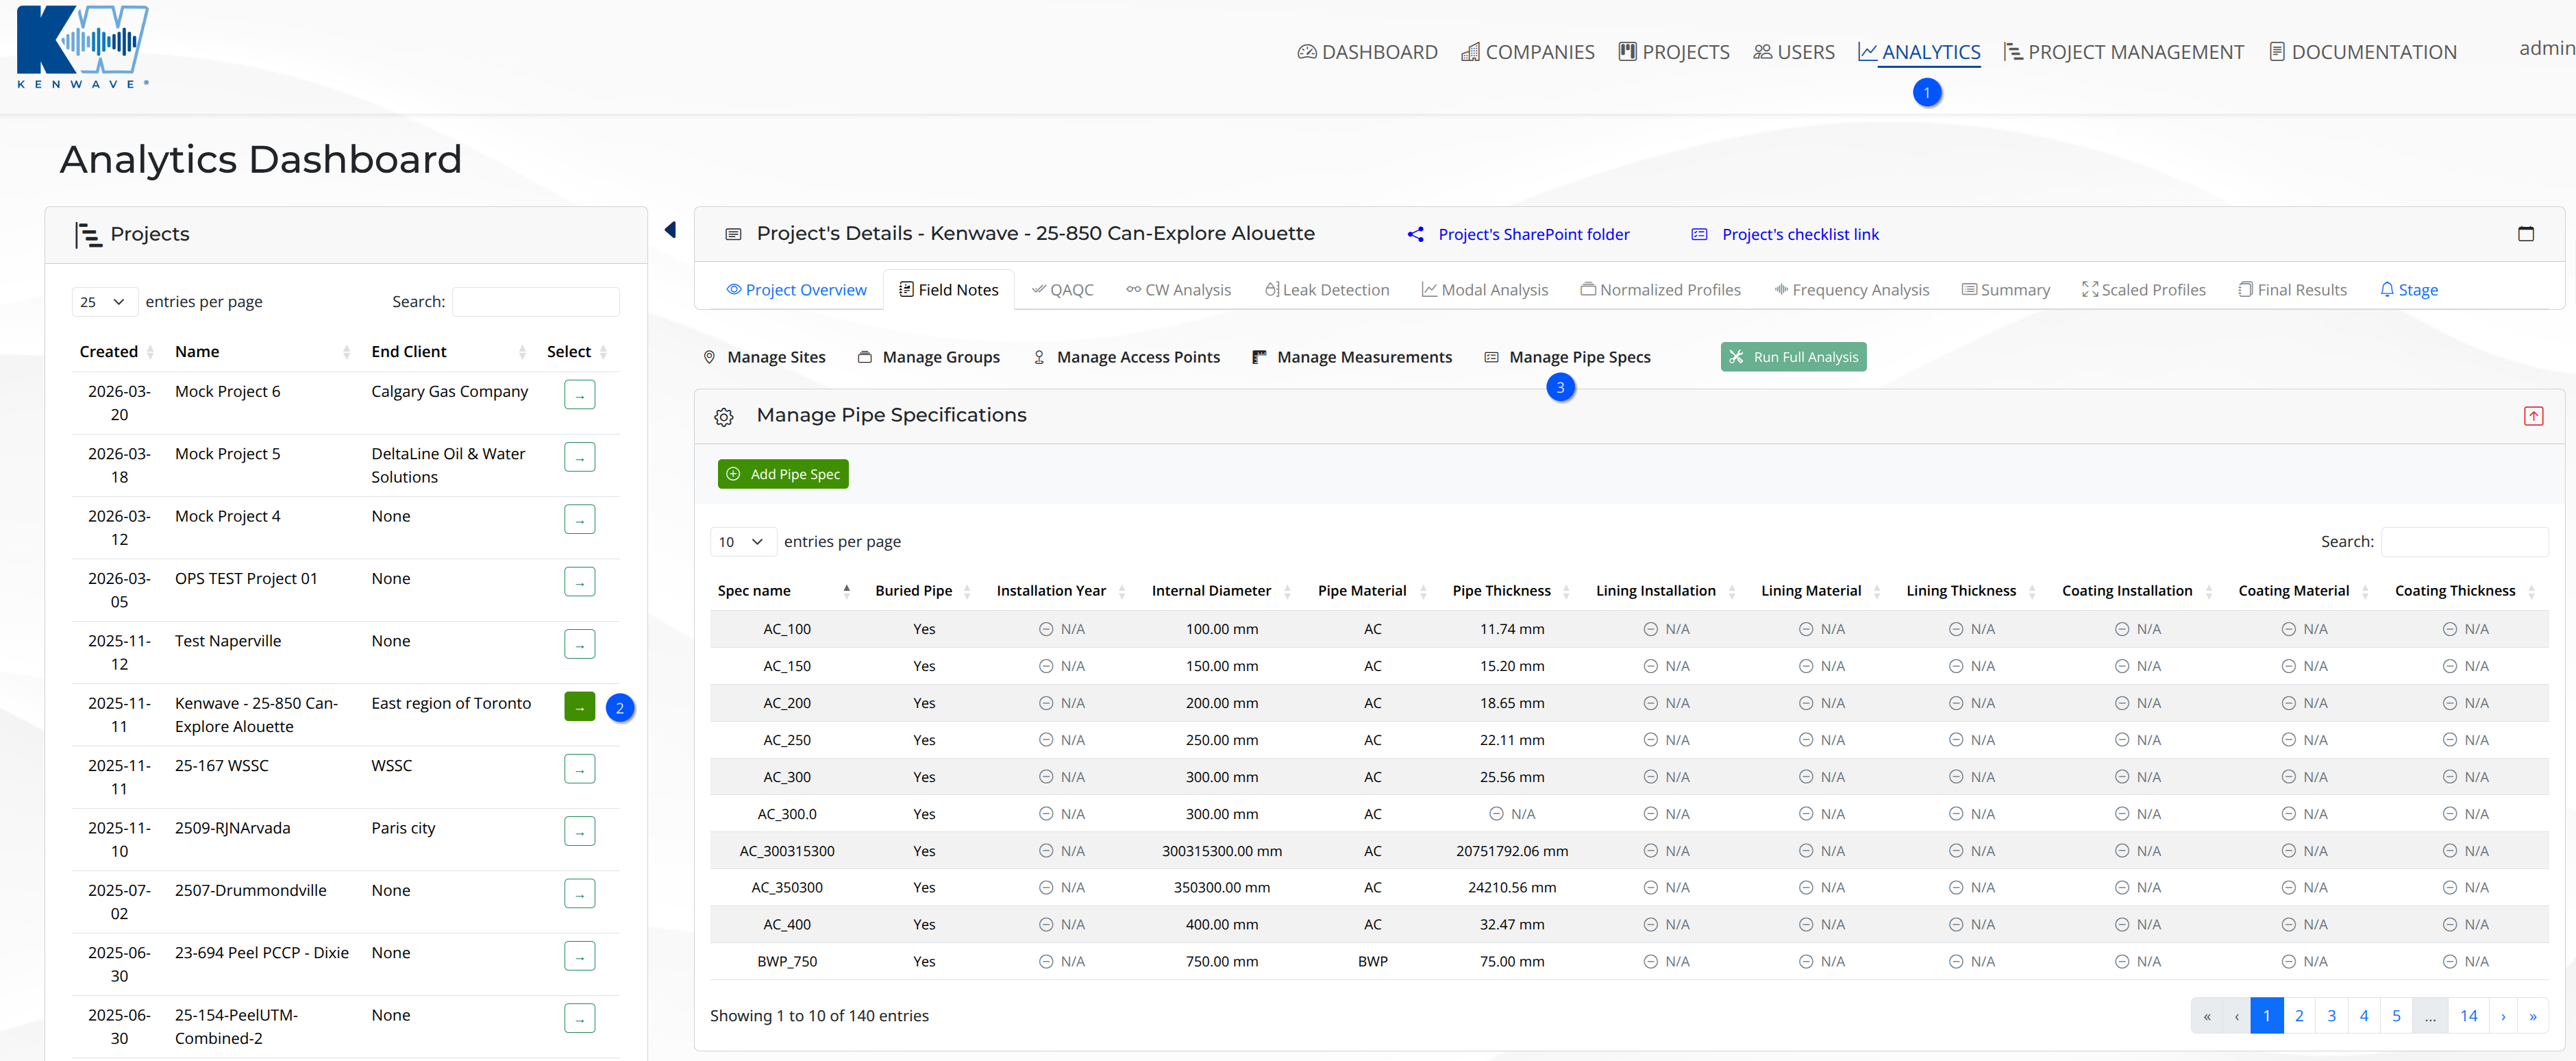
The figure below shows the Manage Pipe Specifications panel with the list of pipe specifications.
Manage Pipe Specifications panel
To open the panel, first select the link Analytics on the navigation bar 1. On the left Projects panel, select the project you want to work with 2. Then, click on the Manage Pipe Specs button
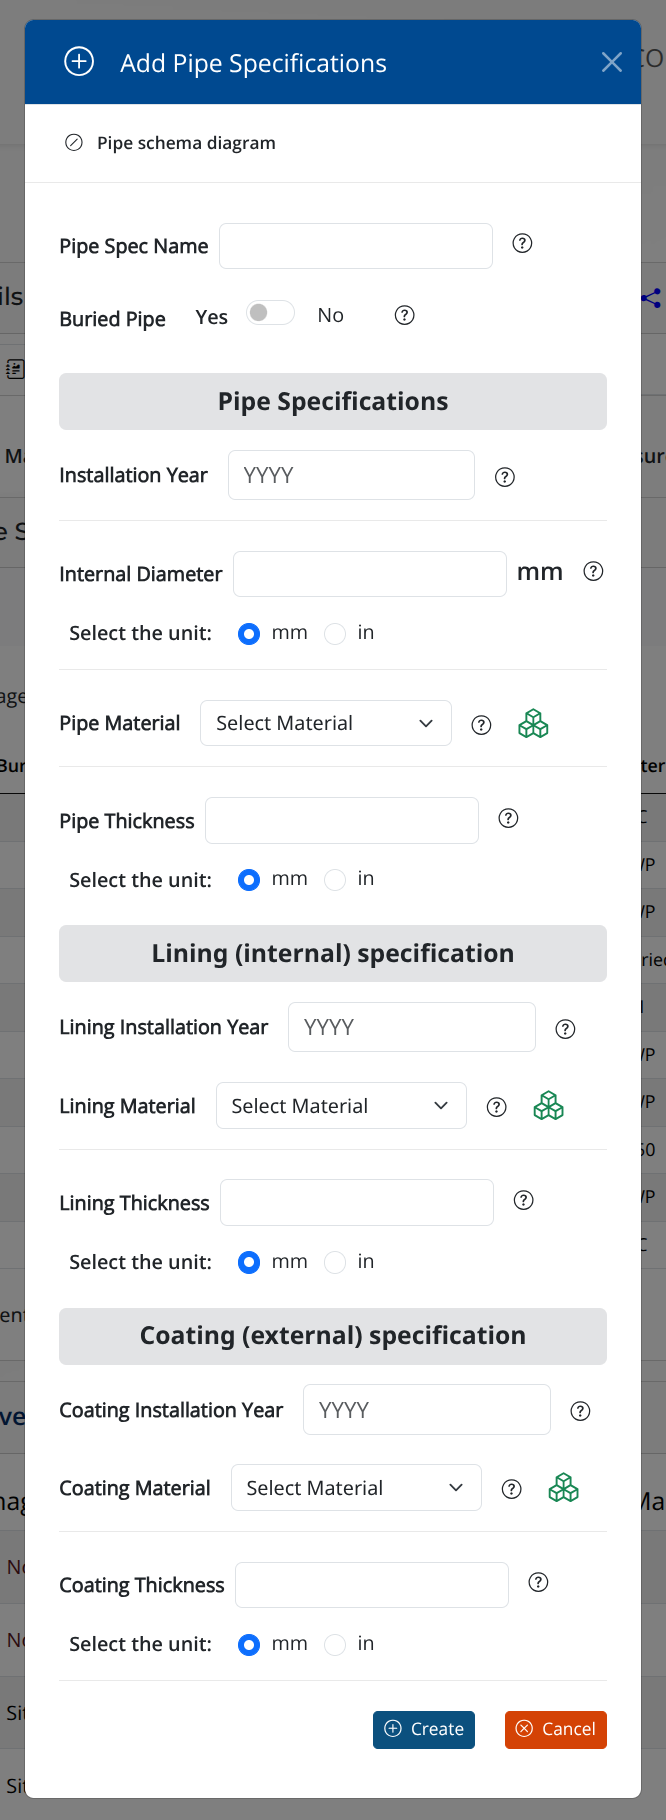
To add a new pipe specification, click on the button. This button will open the Add Pipe Specification modal window where the user can enter the information for the new pipe specification.
The figure below shows the Add Pipe Specification modal window.
Add Pipe Specification modal window
Tip
Unlike the project's access points and measurements forms, the pipe specifications created in the Manage Pipe Specifications panel are available for use across all projects.
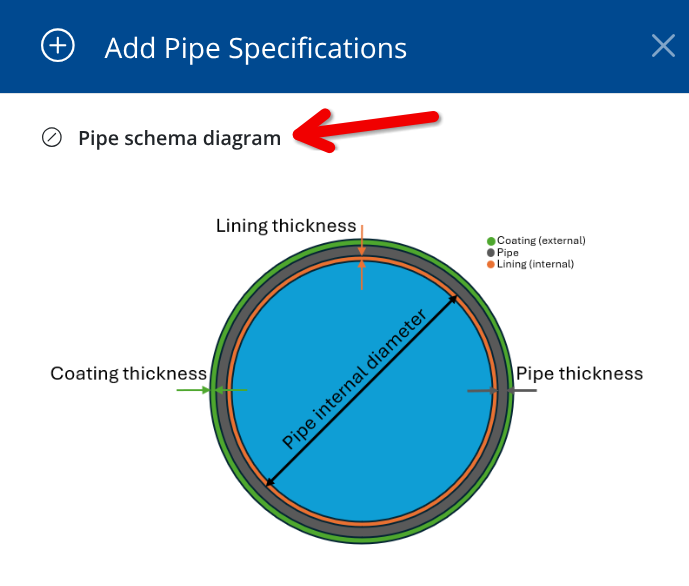
To understand the pipe conventions on the form, click on the Pipe schema diagram label to open an illustration of a pipe vertical cut showing the following elements:
Pipe Internal Diameter: The diameter of the pipe’s inner part.
Lining Thickness: The width of the pipe lining, which is the material used to line the inside of the pipe to protect it from corrosion and other damage.
Pipe Thickness: The width of the pipe itself, disregarding the lining and coating thicknesses.
Coating Thickness: The width of the pipe coating, which is the material used to coat the outside of the pipe to protect it from corrosion and other damage.
The figure below shows the Pipe schema diagram label and the pipe vertical cut illustration.
Pipe schema diagram label and pipe vertical cut illustration
Click on the label again to close the pipe vertical cut illustration.
Fill all the fields in the form and then click on the button to save the form. The new pipe specification will be added to the list of pipe specifications in the Manage Pipe Specifications panel and will be available for use in the other Field Notes Forms.
For each part of the pipe, there's a equivalent section on the form where the user can enter the measurements for that part of the pipe. For example, for the Lining part, there's a section on the form called Lining (internal) specification where the user can enter the lining specifications for the pipe.
Warning
All measurements on the Add Pipe Specification form, like in the Internal Diameter field, are available for the user in meters or inches. The user can select the desired unit of measurement by clicking on the corresponding radio button next to each field. If the field already contains a value, changing the unit will automatically convert the value to the selected unit. However, the unit is always saved in the database with the equivalent value in meters.
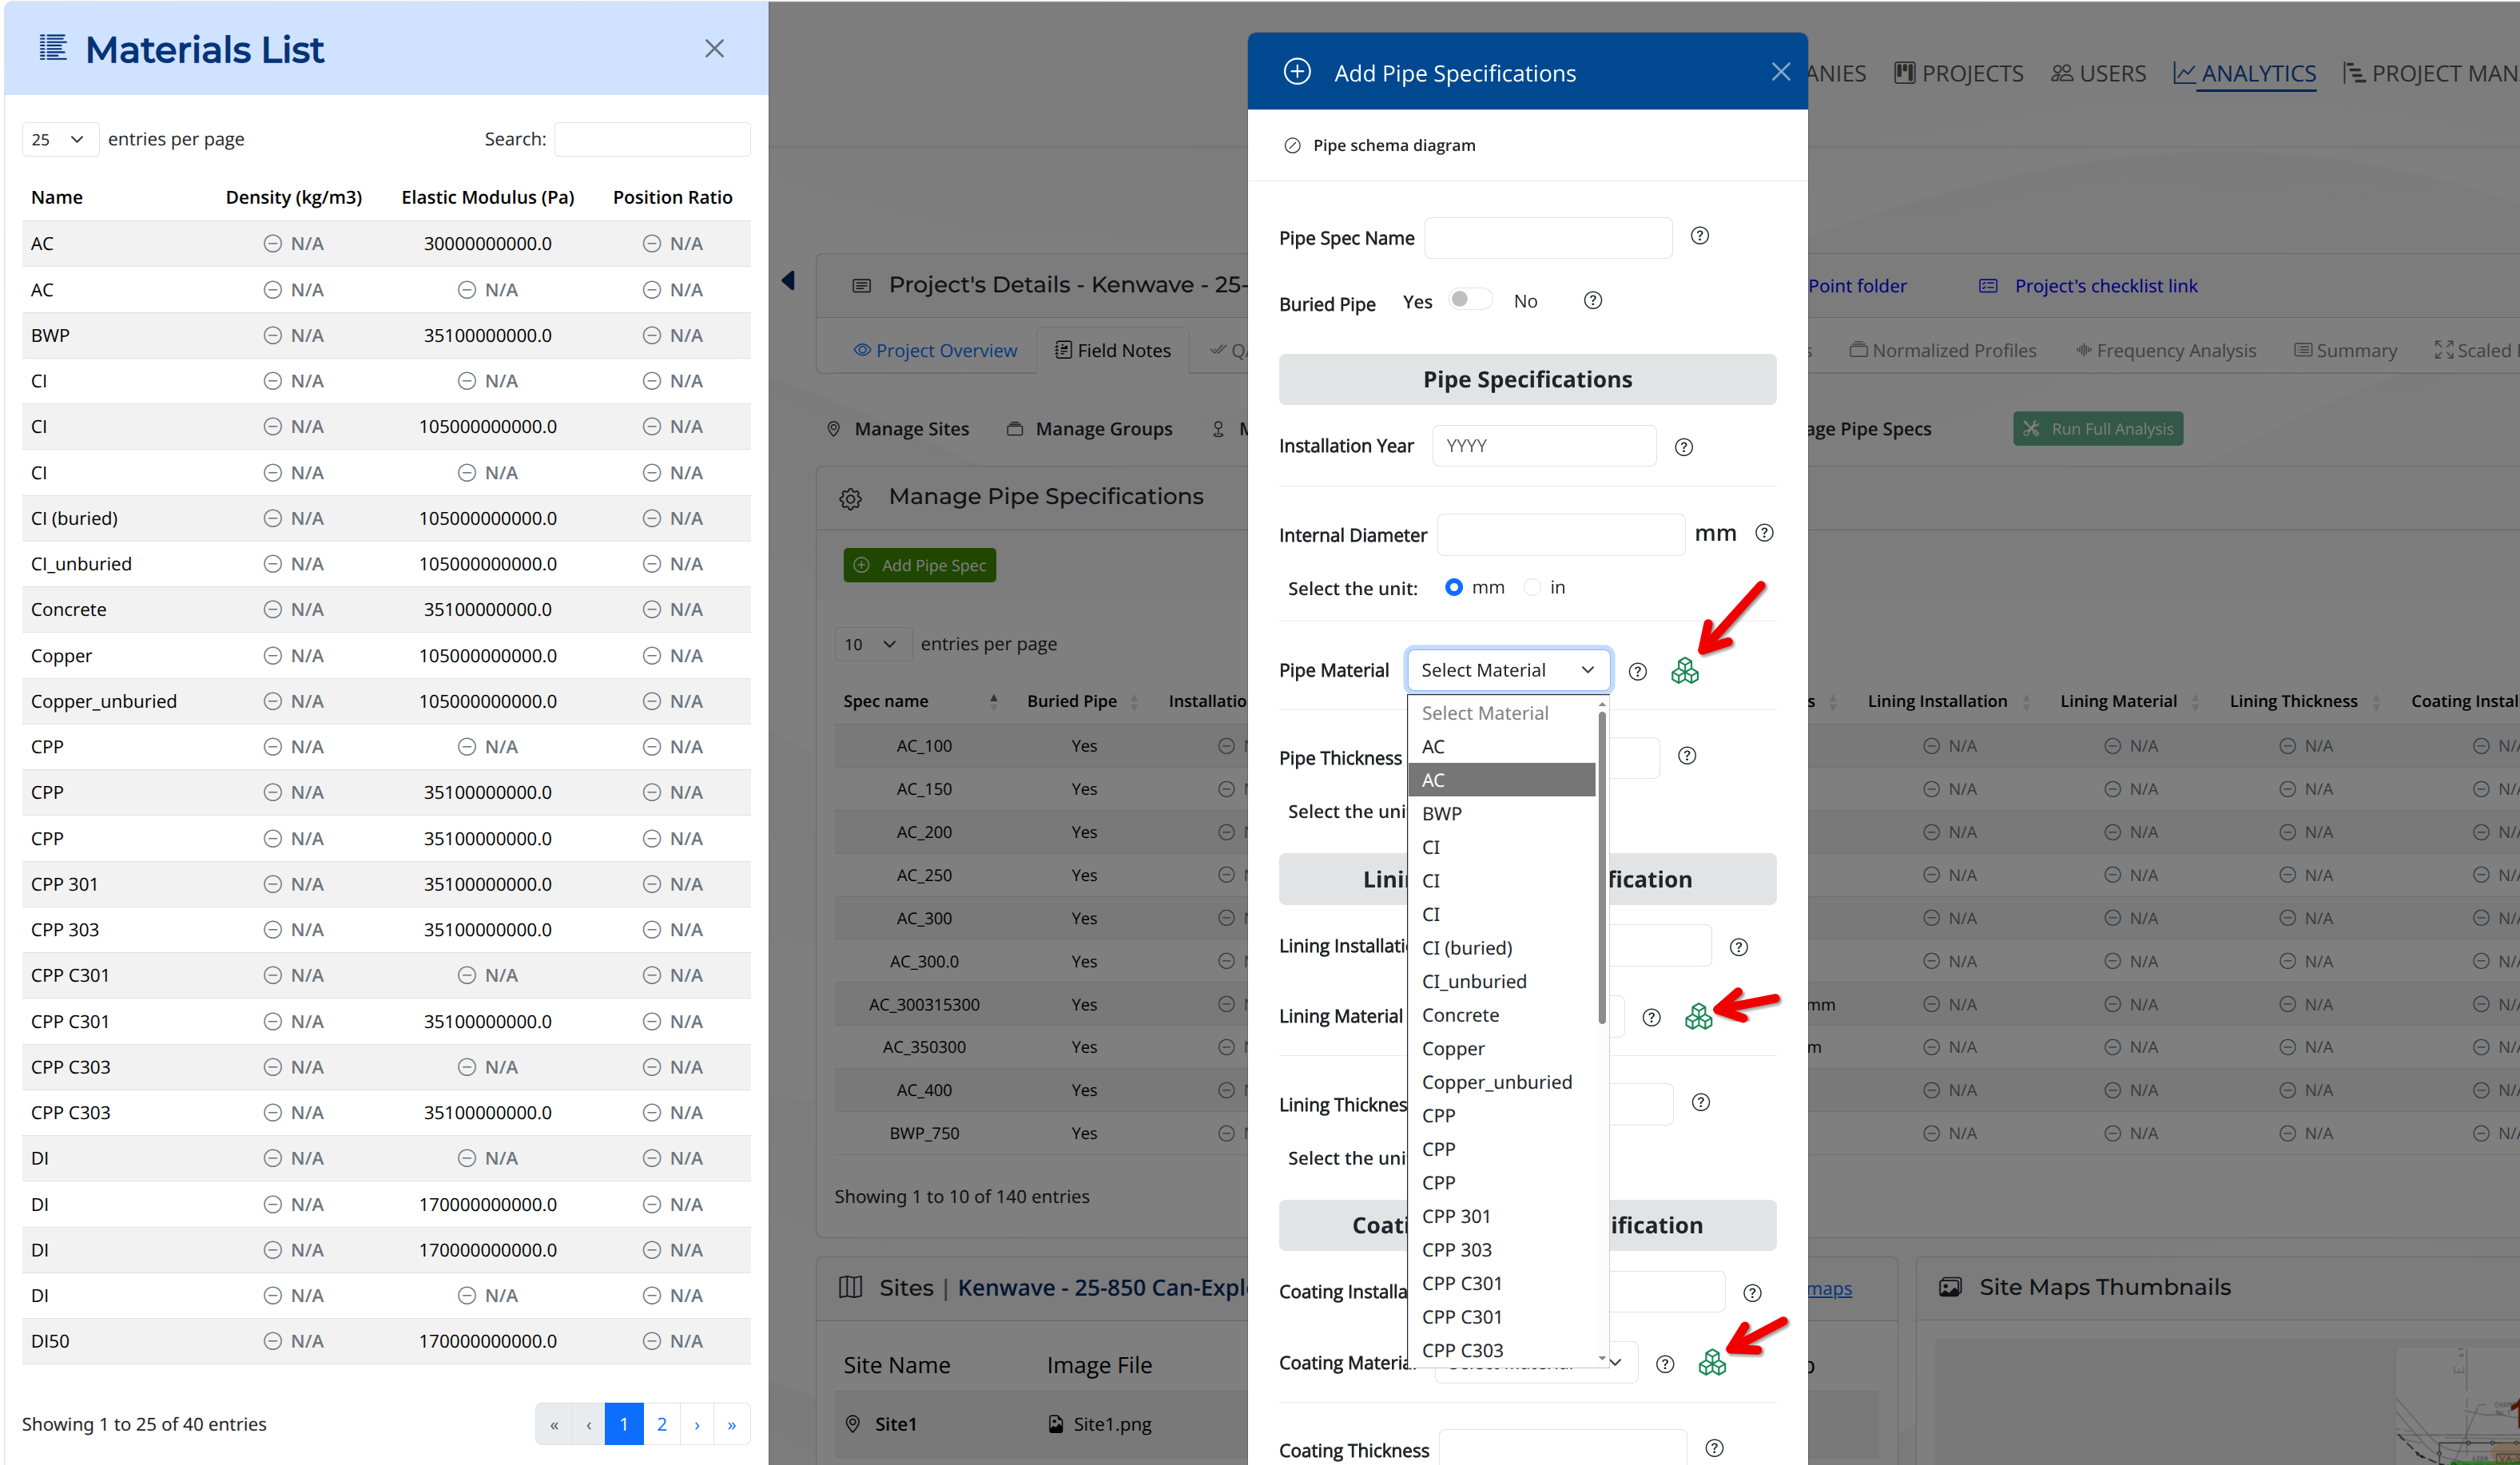
The fields Pipe Material, Lining Material, and Coating Material demand the selection of a material from a drop-down list. To check the current list of materials avalilable, and their properties, click on the icon See the materials list next to each of these fields.
This icon will open the Materials List off canvas window where the user can see the list of materials available and their properties.
The figure below displays the See the materials list icons and the Materials List off canvas window.
See the materials list icon and Materials List off canvas window
Click on the icon again or the Close button on the off canvas window to close it.